
It is important to learn how to pose for a camera to create flattering and attractive photos. Posing is both a verb as well as a noun. This requires practice and good guidance. If you aren’t confident in your ability to pose, you should ask a professional to guide you.
Posing can both be a verb and an adjective
Posing can be a noun/verb with many meanings. Posing can be defined as adopting a certain attitude or position. It can also be used as a way to impress others. In art, posing is a way of presenting oneself in a particular way. The history of the word "posing" is long. It first appeared in 14th-century.
It takes practice
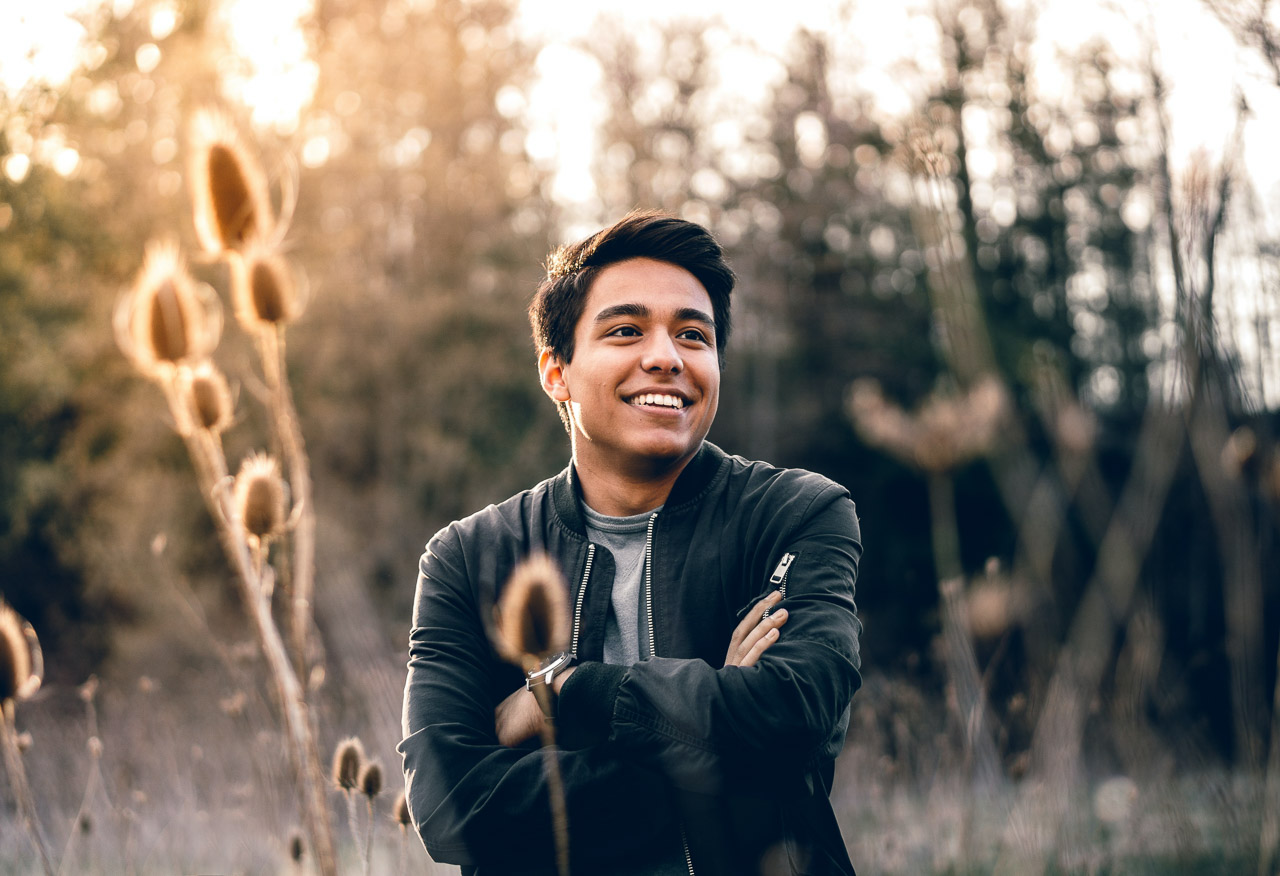
It takes practice to pose well for a photograph. Proper spacing between the arm (torso) and the torso is key. If possible, place your arm on either your hips or upper thighs. If that isn't possible, place your arm on your shoulder or back. Avoid shooting yourself directly in the face as it can look unflattering. To create visual interest, shoot at a 45 degree angle.
It should be directed by a professional photographer
Properly posing the subject is essential for a good photo. Posing is not just about telling the subject what they should do. It is also about directing their actions and directing the result. Successful photographers know that the passive point-and-shoot method is haphazard and error-prone. Posing should be led by an experienced photographer who knows how to direct a subject.
You should do it on a balcony.
A balcony with great natural light is the best place to pose for perfect photos. You should try to get a table early in the morning before the sun sets. You will find fewer people at your table and can enjoy a great view. Additionally, guests won't be disturbed if you stand up and take pictures. You can add interest to your picture by adding railings or plants to the background.
It should not be done from far away
When posing for a picture, try to look at yourself from a distance. This will help define your jawline, and chin. Try to place your camera slightly higher than your eyes. This will make your entire body appear smaller. It is particularly useful for curvier women.
It should be done using a template
Selecting the best location is key to posing a model. Use a natural spot, if you can. Don't ask your model to stand straight while staring at the camera. This could cause awkward poses with a stiff expression. Instead, ask your model to take a look at a beautiful scene or to think about something. This will create a natural pose and make the model feel more relaxed.
FAQ
Is digital photography hard?
Digital photography isn't as simple as you might think. It takes time and effort to learn how to use the tools properly. It is important to be familiar with the settings that are best for each type of shot. It is best to practice what you have learned. Practice makes perfect.
Cameras available for purchase
There are many places online that you can purchase cameras. B&H Photo Video is a well-respected retailer. Their knowledgeable staff can answer any questions that you might have.
B&H ships quickly and securely to make it easy for you to get your order to your door.
You can learn more by watching this video about shopping for cameras.
Light Room can enhance your photos.
It is important to begin early in order to have great photos. It is always better to take as many photos as you can and then choose the best.
This is possible because Lightroom lets you see how different settings affect each image. You can also adjust these settings on-the-fly without going back into Photoshop. This allows you to quickly test what looks great and what does not.
Statistics
- In this case, 100% of readers who voted found the article helpful, earning it our reader-approved status. (wikihow.com)
- The second easiest way to get blurry photos 100% of the time is to use a cheap filter on the front of your lens. (photographylife.com)
- This article received 13 testimonials, and 100% of readers who voted found it helpful, earning it our reader-approved status. (wikihow.com)
- That's the easiest way to get blurry photos 100% of the time. (photographylife.com)
External Links
How To
How to take pictures in low lighting conditions
Low-light photography can be defined as taking photos in dimly lit and dark environments. It requires special equipment. The main challenges in this field include controlling exposure, whitebalance, and sharpness. Two types of low-light photography exist: ambient or flash. Flash photography works best when there is enough lighting around. You will need a flash if you don't have enough natural light. A flash might be necessary if you are photographing a subject indoors and outside. A flash is not necessary if you aren't interested in shooting at night with the moonlit hours. This will give you some beautiful shadows and colors. Another option is shooting at twilight. Twilight is the time when the sun has set and there's still daylight.
Long exposures may be something you want to explore. Long exposures enable you to take images even after your shutter has been open for several seconds. The camera records only light that falls on it if the shutter is not closed. This light continues to fall onto a photo sensor throughout a prolonged exposure. The shutter is still closed so no light can enter the lens. As a result, you see very little movement. To ensure clear images, disable any autofocus and exposure settings. Adjust the ISO setting before you start to shoot. An ISO setting of 200 allows you to adjust how bright or dark the image looks. When you're ready for the shot, press quickly the shutter button. This causes the shutter to close completely. Keep the shutter button pressed down until the last second. To prevent additional light entering the camera, hold the shutter button down. Wait a few seconds after you have taken the photo before you release the shutter button. This allows the camera time to process the photo. While you wait, your photos will be displayed on your computer's screen. Once you're satisfied with them, save them to your computer.